Testing React Native Components with Jest
Author: Milli Beckers, Software Engineer at Skillz Inc
Jest is the officially supported testing library for React Native. Those less familiar with the basics are encouraged to take a look at their documentation page on matchers to gain greater understanding of what Jest is all about.
Once you’ve done that, you may notice a page of documentation specifically for React Native. “Great,” you think, “I have components that I want to write tests for and this will show me how to do that.” Unfortunately, while the page contains useful information on customizing configurations, as far as practical examples go it only provides a surface-level snapshot test. Hopefully, this article fills in some of the gaps by providing examples of how to write tests for a few common situations.
Snapshot Tests
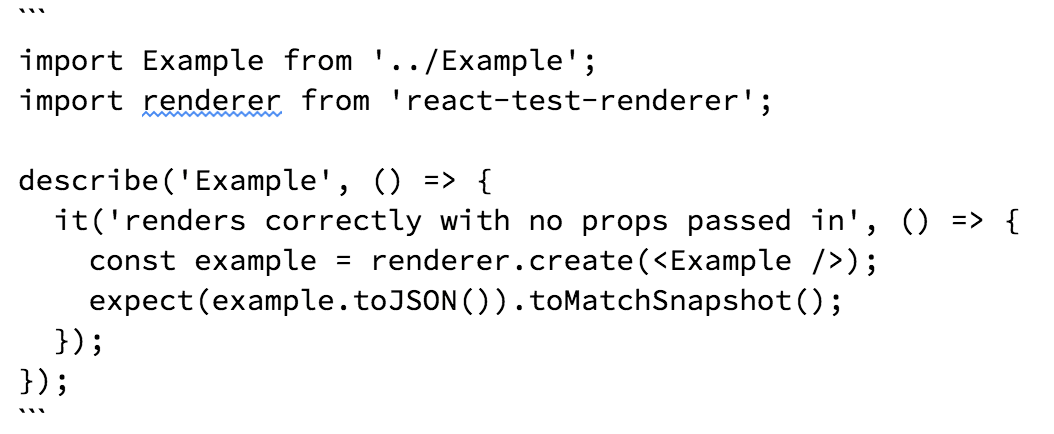
The Jest documentation provides a great article on how and why to write snapshot tests. To summarize, snapshot tests pseudo-render components as a JSON, which gets saved into a snapshot file. Then subsequent runs of that test will compare the current JSON to the existing one and highlight any differences, allowing you to catch any surprise changes.
A basic snapshot test example looks like this:
Testing iOS vs. Android
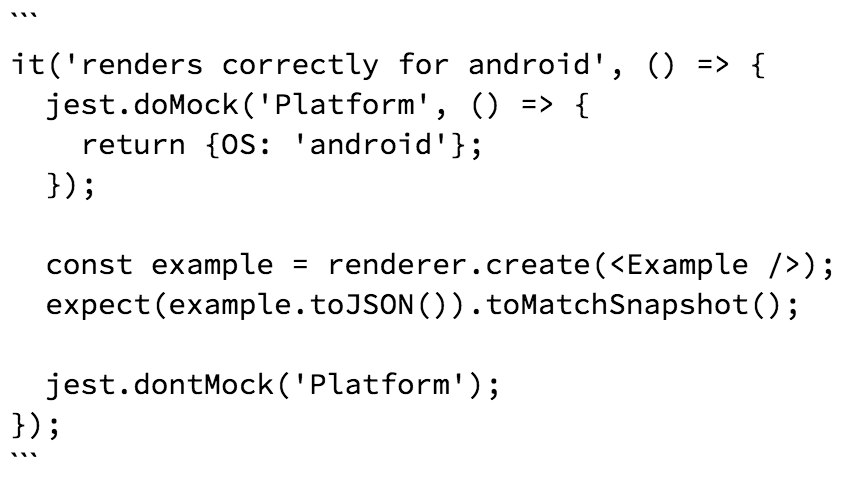
Sometimes we want to display different pieces of UI on different platforms, but how can we test that both variations render correctly? While it is possible to configure Jest to run all tests as though they were on Android instead of iOS, that doesn’t help when you need to switch back and forth between the two. The following example demonstrates how to temporarily set the platform to Android.
For this case, we will use jest.doMock to temporarily mock out the entire Platform module. This way, any calls to Platform.OS inside your component will return Android. Always remember to remove the temporary mock at the end of your test, otherwise subsequent tests will continue to run with the modified behavior.
Testing Different Screen Sizes
Mocking Dimensions is even easier than mocking Platform. We can use the normal mocking pattern to apply the mock for the entire test suite, and then when it comes time to run the test on a different size we can replace the mock implementation for the next time the function gets called.
Assuming you determine the screen dimensions on each render as recommended by the React Native documentation, you can test sizes using the following example. The default test behavior for Dimensions without mocking would be to return a height of 1334 and a width of 750, which is the screen size of an iPhone 8.
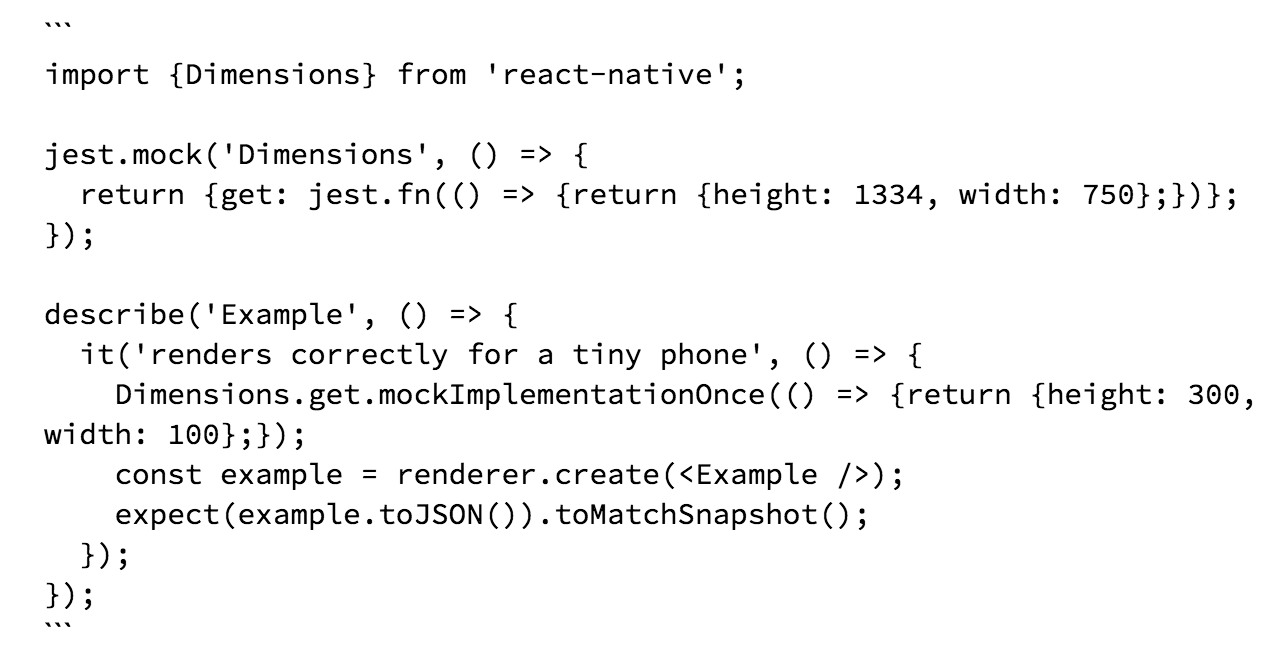
However, it’s important to note that if you are using Dimensions in constant style definitions (such as in a const StyleSheet.create at the bottom of the component’s file), changing the return value of Dimensions.get won’t reevaluate the styles. Creating snapshot tests for different screen sizes using this method will mean refactoring your code to match React Native’s recommendations.
Testing with Another State Value
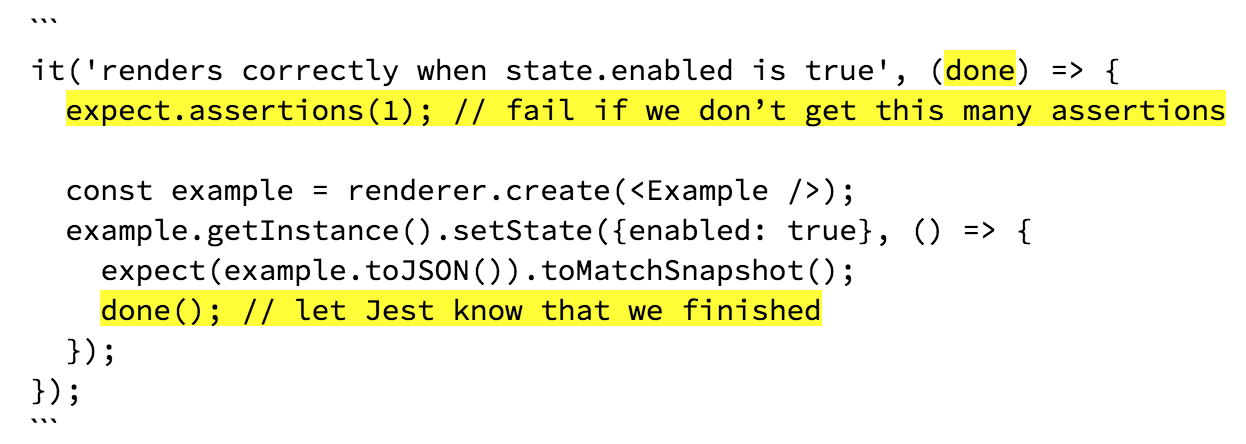
The setState function is technically asynchronous, so the only way to guarantee the component’s state will be changed by the time the snapshot executes is to make the assertions in setState’s callback. However, this introduces a new issue – if we don’t tell Jest we are performing asynchronous operations and then the test terminates before the assertions can run, it will be marked as passing even if the assertions should fail. This actively harms you by swallowing errors and tricking you into thinking everything is fine.
To prevent this, you need to add the done function parameter to your it to tell Jest not to terminate until done gets called. It’s also important to tell Jest how many total assertions to expect. This is another (some may say redundant) way of ensuring the test is marked as a failure if the callback never executes or the test terminates early. For more details about testing asynchronous code with Jest, take a look at their documentation.
Testing Logic Methods on Components
The object that renderer.create returns doesn’t mean anything on its own, this is why snapshot tests need to call the toJSON() method. Similarly, to test a logic method that’s defined on a component, you have to obtain its instance by calling getInstance(). An instance is the same kind of object that you would get if you had a ref to this component, so you can treat it the same as a ref.

Testing setState
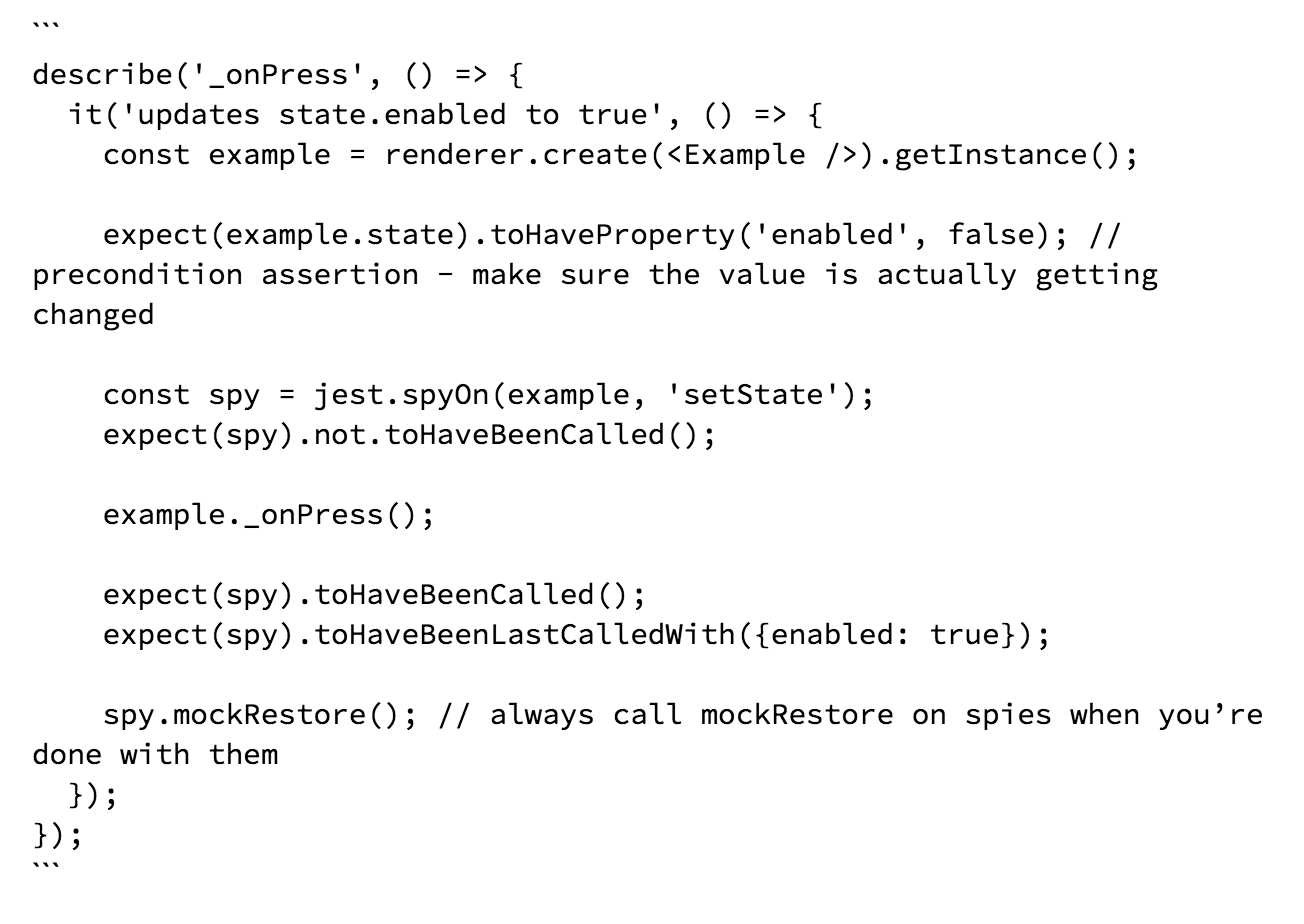
Testing that a method sets the component’s state is a super common thing to want to test, but it’s surprisingly difficult to figure out. The Jest documentation makes no mention of it, and online search results tend to assume you’re using the Enzyme library. After several iterations with varying levels of effectiveness and elegance, I have arrived at the following code as the cleanest pure-Jest solution.
This approach leverages a piece of Jest known as Spies, which is a powerful tool that allows for setting up some very complicated mocking on the fly. In this case, you can use it to monitor calls being made to the setState function. The spy tracks all calls made to its target function, as well as any arguments that were passed in, so all you have to do is make assertions on the arguments it received.
Note that there aren’t any assertions on the component’s state after the action is taken – this is due to setState’s asynchronous nature. There is no guarantee that it will execute by the time we make our assertions, but this way it doesn’t matter. As long as the function you’re testing makes the call to setState correctly, it has fulfilled its obligations.
Jest offers many powerful tools that can build some very detailed and complex tests. However, when it comes to these basic React Native scenarios, there aren’t many examples out there. These examples should help bring your React Native component testing to the next level.
